Informational Text Writing Unit of Study

Use this writing informational text unit of study to help you put together your writing workshop. Contains mini-lessons, anchor charts & more.

We have created this informational text writing unit of study to help guide your students through the nonfiction writing process.
Current reading standards emphasize the importance of students learning how to pull important information from informational text.
This writing unit is designed to teach students how to research and turn the facts they find into books.
You will be able to download the complete, free collection by clicking on the bold, green words at the bottom of this post.

Lesson 1: Noticings

- To begin this unit, compile a large collection of nonfiction books.
- Next, put students in pairs or small groups and give them one or two books and a small stack of Post-It notes. Tell students to begin looking through their book(s) to see what they notice about them. Tell them that they are to take the post-it notes and record their observations about the text features of these nonfiction books. (This is a great activity to do at the beginning of every writing unit of study.)
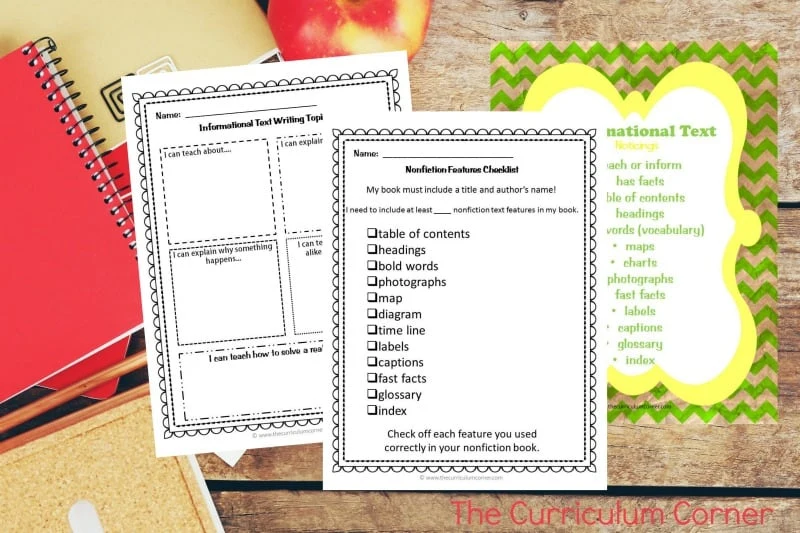
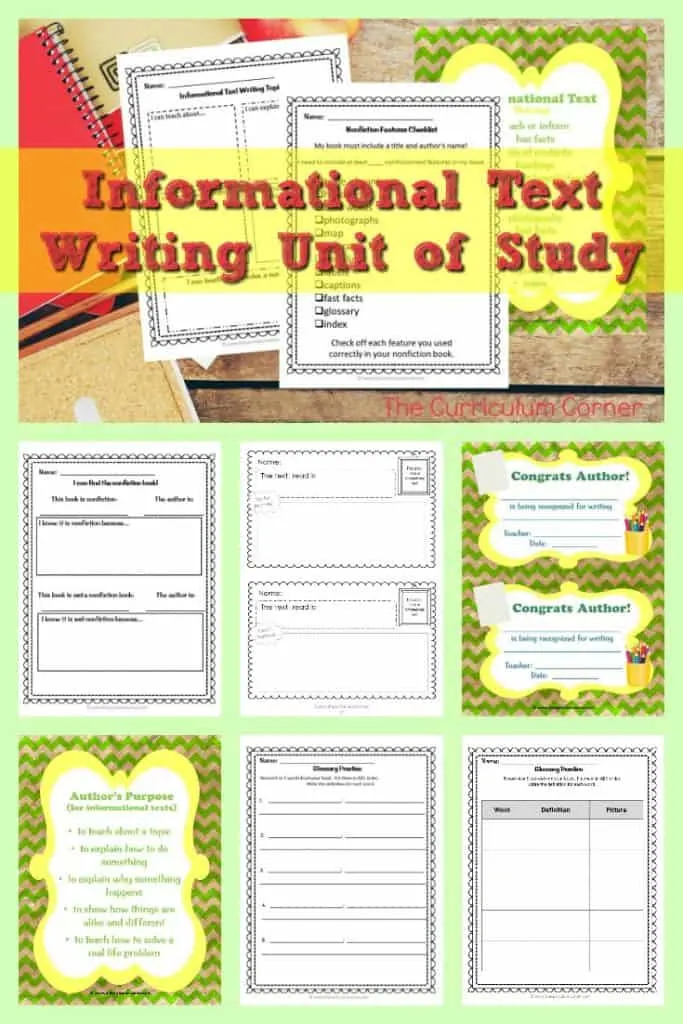
- Our resources include an Informational Text Anchor Chart which includes many of these noticings to use as a reference in your classroom.
Lesson 2: Comparing Informational Text to Literature
- To start this lesson, choose two books – one fiction and one nonfiction – that have a similarity in their topics. For example, you might choose the National Geographic Kids: Frogs! and Froggy Rides a Bike (or another Froggy book.)
- After reading aloud or sharing the books, talk about the author’s purpose for each book. Lead a discussion that helps students learn that nonfiction books are written to teach or inform while fiction books are written to entertain.
- Next, you can give pairs of students two books each (one fiction & one nonfiction) and use our I Can Find the Nonfiction Book resource to identify distinguishing characteristics of these two types of books.
**NOTE: If your students have not yet studied nonfiction text features through reading mini-lessons, you might choose to incorporate some of these lessons into your writing unit at this point: Informational Text Features Close Reading Text Features
Lesson 3: Structures for Writing Informational Text
- Many students will likely come up with a few simple topics that they think they want to write about. We also want students to be able to understand that informational text includes more than just “all about” books so we try to expose them to more.
- Gather a variety of informational texts to share with your students. Be sure to include some “all about” books, but also find other types that present information in different ways. These books might include: how to, cause/effect, problem/solution, informative, etc. You may even want to think about showing students things like product manuals, newspaper articles, and/or brochures so that they can see that informational text can be more than just teaching facts about a topic.
- Use our Author’s Purpose for Informational Texts anchor chart to get students familiar with some of the different structures for delivering informational text. You want students to learn how to teach about a topic, to explain how to do something, to explain why something happens, to show how things are alike and different (compare/contrast), to teach how to solve a real life problem.
- If you think it would help for understanding, pass out our Focus on Author’s Purpose exit tickets to individual students or pairs. Have them read or skim informational texts and use the anchor chart as a reference as they write the author’s purpose for those particular texts.
Lesson 4: Choosing Topics

- Students need to begin to brainstorm ideas for their writing for this unit so that they have some choices when they begin writing for this unit.
- Use our Informational Texts Writing Topic Choice pages to help your students brainstorm possible topics for writing nonfiction. We have included one that is geared towards those “All About” books (since many students feel comfortable with those) and another that gets more specific and allows them to brainstorm ideas for other types of structures for informational texts.
- Show and explain both of the organizers and model how to fill them out by writing topics you might choose yourself. After the mini-lesson, have students work in partners or small groups to complete their own organizer. We have found that allowing children to talk as they work through this organizer, helps students brainstorm more ideas.
Lesson 5: Finding the Facts
- After students choose a topic they want to write about, you may need to take a trip to the library to find appropriate books for them to read and learn more about their topics.
- You will also want to find some kid-friendly online resources that will help them to learn more. (If you have limited access to computers for your students, you might want to find and print some articles to give to them. You can also ask for parent help and have students bring some books or articles from home if possible.)
- After getting some reading material to expand their knowledge, your students will need some modeling of exactly how to pull facts from their reading. Read aloud a book (or an exerpt) about a topic that you will write about in front of the class.
- Use our short Focus on Facts page and show them how to read and write important facts they want to include in their nonfiction book.
Lesson 6: Beginning Research Practice
- This lesson is similar to Lesson 4, but goes deeper into research practices.
- When students first begin writing their own informational pieces, they will definitely use their own prior knowledge first (Most students do. They tend to write about topics on which they feel they are “experts”).
- Along with this prior knowledge we have to teach students that they need to do some reading and research to learn more and also to check the facts that they think they already know.
- The research they will be conducting should start out very simply. For this reason, we have created a Nonfiction Writer’s Notebook designed to help students record their research.
- Model reading a nonfiction book and recording some important facts you find on the organizer. During independent writing time, we suggest laying an assortment of nonfiction books around the room and allowing students to work together to practice researching. Depending on the age of your students, you might need to modify this task. Younger students might need books read to them so you might work with groups and read the text to them.
- The point is to get them to understand that writing informational texts will involve some learning and research so that what they are writing is true.
Lesson 7: Using Other Resources to Learn About Topics
- This lesson involves a discussion of other resources writers might use to research a topic.
- Ask students how else they might gather information about their topics. Among the answers should be asking experts or watching factual movies about the topic.
- If possible, have an “expert” visit your class to learn more about one of the topics you have written in your Nonfiction Writer’s Notebook. To practice recording facts while watching a video clip, you could use this fun clip about potato chips from National Geographic Kids: Potato Chips Galore!
- Students can complete a page in their nonfiction writer’s notebook as you discuss what they saw or you could fill out a class page together as students participate in the conversation.
Lesson 8: Preparing to Write
- Pick a favorite nonfiction book that is rich with nonfiction text features. Share this as a read aloud at the beginning of writing. Talk about the features the author chose to use.
- Share the Nonfiction Features Checklist with students.
- Practice using the checklist by going through the book you read to determine the number of features the author used.
- Next, pass these out to students and let them know that they will need to include a predetermined number of features in their piece of writing, or you could differentiate depending on the needs of your students and require a different number of features based on individual ability.
- The purpose of this checklist is to make sure students will incorporate important informational text features and that they think about what they want to include before they begin to write.
Lesson 9: Turning Facts Into Writing
- This lesson involves showing students how to use their Nonfiction Writer’s Notebook and Nonfiction Features Checklist to begin a draft of informational text.
- Model for your students how you would transform one of your topic and fact pages from your own Nonfiction Writer’s Notebook into a nonfiction book.
- As you begin modeling, get out your checklist and point out when you will include the nonfiction text features you have studied.
- If you would like to use a template for your draft, you might want to use our Nonfiction Writing Blank Book Pages. You can show students how to write individual pages and then put them together in a stapled book once the pages have been written. This may need to happen over the course of a few days because you will also need to model how you will add the informational text features into the boxes provided on the pages. You may also want to think about modeling this a few times as you write two different nonfiction books in front of your class. Once your modeling has occurred, you can then let your students know where your blank books/pages will be located and let them get started (if they are ready) on their own pieces.
**Conferencing will be very important as students begin writing, so that you can provide the one-on-one guidance each student needs. If you would like some resources on effective conferencing, you can check out our conference guide which is located in our Writing Management Binder.
Lesson 10: Creating a Glossary
- Students often need help understanding and creating a complete glossary for their nonfiction books. Many skills go into doing this successfully.
- We have created two different Glossary Practice pages to help your students organize a glossary.
- You can choose one or model both and give your students a choice of which to use. Return to the book you wrote in front of your class. Read the text aloud and choose 4 or 5 words you will include in a glossary for the book. Have students help you alphabetize the words and model how you will complete the glossary practice page by filling in the definitions from a dictionary or online resource.
NOTE: The Glossary Practice page could also be used at a center. Provide 5 words on index cards that go with your current science or social studies unit of study. Students can complete the practice page by alphabetizing the words and then writing definitions.
Lesson 11 (and beyond): Continue Writing
- For your next few mini-lessons, refer to your writing conference notes for skills you feel that students are struggling with.
- If there is a specific text feature students are not understanding well, you can model it by adding this feature to the book you created or in a new book.
- Depending on your class, students may need additional days of writing to complete their books before moving on to the next lessons. You will determine this based on your conferencing as well.
- Continue with mini-lessons addressing needs until all students have time to get their drafts completed.
Lesson 12 & 13: Revision & Editing
- Of course you will need to model for students how you would revise and edit the book you created.
- Talk about ideas for including more descriptive words and adding details to pictures.
- Have students partner up and read their books to each other. If this is a new practice for your students, you may benefit from our updated post on Launching Writers’ Workshop which touches on revision and editing and contains resources you can also use during this unit. Again, this may take a few (or even several) days.

At this point, you might move on to a new unit of study or go farther in depth with nonfiction writing. If you decide to go more in depth, we have created a research organizer and blank book to help you. You will find these here: Nonfiction Printable Blank Book. This organizer is designed to require more research from your students. It is perfect for second and third graders who need more!
Unit of Study Celebration:
We like to celebrate all of our units of study with some type of celebration. We believe it is important for students to share what they have been working on with others – just like real authors. This can be a very simple gathering where you invite in families, other staff members from your building, or even another class and have students read stories together or aloud. Or you might want to plan something more elaborate and include snacks and drinks. We have included a Book Dedication template students can fill out and glue inside the front covers of their books and also a Congrats Author certificate you can print and fill out for your students to take home.
***The last page of our resources is a blank anchor chart that matches our other resources for this unit. You can use this for additional mini-lessons you teach your students. Also, in case you want some additional blank book resources, here is a link to Other Blank Book Templates.
You will find most of the resources described in the lessons below here:
Writing Informational Texts Resources
Hope your unit goes well! You will probably be amazed at the wonderful knowledge your students gain and the nonfiction books they create!
Mentor texts we love (contains affiliate links):


